Spring is a great time to get outside and do some gardening. It’s the perfect time to start planning your garden and get it ready for the season. Whether you’re a beginner or an experienced gardener, there are plenty of tips and tricks to get your garden ready for a blooming spring. In this blog, I’ll be sharing some of my best gardening tips for a successful spring. So, let’s get started and get ready to dig in!
Preparing your garden for spring
Prepping your garden for spring is the first step to ensuring a successful season. Start by removing any debris from the garden and weed out any unwanted plants. You’ll also want to check for signs of pest or disease damage and take steps to prevent any further damage. You can also start to prune any trees or shrubs to encourage new growth. Finally, add some fresh soil and compost to your garden beds to give your plants a nutrient boost.
What to consider when planning your spring garden
Planning your spring garden is a great way to get organized and make sure you’re planting the right plants in the right place. First, consider the type of plants you want to grow. Do you want to grow vegetables, herbs, or flowers? Then, look at the size of your garden and the amount of sunlight it gets. This will help you determine what plants will thrive in your space. Finally, make sure you research the plants you’re planting and plan for their care throughout the season.
Early spring gardening tips
If you’re looking to get a head start on your spring garden, there are a few things you can do. Planting cool-season crops like lettuce, spinach, and kale can help get your garden off to a good start. You can also start planting some of your warm-season crops indoors or in a cold frame. This will give them a good start before you can transplant them outside. Finally, spreading mulch around your plants can help keep the soil temperature consistent and retain moisture.
Tips for planting in the spring
Once you’ve planned your garden, it’s time to start planting. When planting in the spring, make sure to prepare the soil first. Add some compost and mix in some organic matter to make sure your soil is rich and fertile. Then, check the weather to make sure the soil isn’t too cold or wet. Finally, add some fertilizer to give your plants a boost of nutrients.
Raised beds for spring gardening
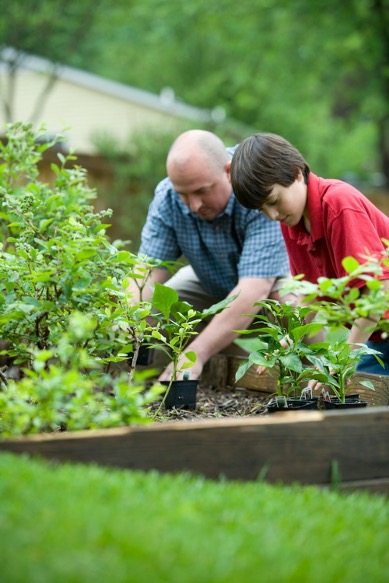
Raised beds are a great way to get the most out of your spring garden. They make it easier to control the soil quality and drainage, and help you get the most out of your space. When planting in a raised bed, make sure to add plenty of compost and mix in some organic matter. This will help make sure your plants have the nutrients they need. You can also add some mulch to help retain moisture and keep the soil temperature consistent.
Here are some great tips for your raised garden bed:
When creating a raised garden bed, it’s important to choose the right location that receives ample sunlight and has good drainage. Plan your garden layout by deciding what you want to grow and how much space each plant needs, which will help determine the size and shape of the bed. To build a sturdy bed, use rot-resistant wood, such as cedar or redwood, and make sure the sides are at least 6 to 8 inches tall. If wildlife or pets are a concern, consider adding a protective barrier, such as chicken wire or a small fence. Fill the bed with a high-quality, well-draining soil mix specifically made for raised beds, and consider installing a simple irrigation system, such as a soaker hose, to ensure that your plants receive enough water. Regularly add compost or fertilizer to the soil, control weeds with mulch, and provide support for tall plants like tomatoes. Maintaining your raised bed includes regularly checking for pests, diseases, and other issues, keeping the soil moist, and removing dead or yellowing leaves to promote healthy growth.
Here’s a list of supplies you’ll need to create a raised bed garden:
- Lumber: You’ll need rot-resistant wood, like cedar or redwood, to build the sides of the raised bed.
- Tools: You’ll need a saw, drill, and screws to assemble the raised bed. You may also need a level and measuring tape.
- Soil: High-quality, well-draining soil mix specifically made for raised beds.
- Irrigation: If desired, you can install a simple irrigation system, such as a soaker hose, to water your plants.
- Compost or fertilizer: To add nutrients to the soil and support plant growth.
- Mulch: To help control weeds and retain moisture in the soil.
- Supports: If you’re growing tall plants, like tomatoes, you may need to provide support in the form of stakes, cages, or trellises.
- Protective barrier: If wildlife or pets are a concern, consider adding a protective barrier, such as chicken wire or a small fence, to keep them out of the raised bed.
- Seeds or seedlings: Choose the plants you want to grow and either purchase seeds or seedlings from a nursery.
- Optional: compost bin, compost activators, compost turner, row covers, and/or physical barriers to reduce pest and weed problems.
By gathering these supplies, you’ll have everything you need to create a productive and beautiful raised bed garden.
Composting for spring gardening
Composting is a great way to add nutrients to your garden and help reduce waste. Start by creating a compost pile using a combination of green and brown materials. The green materials provide nitrogen and the brown materials provide carbon. Make sure to turn the pile often to aerate it and keep it moist. You can also add some additional fertilizer if needed. Once it’s ready, you can spread it around your plants to give them a nutrient boost.
Here are some tips for composting in the spring to support your gardening efforts:
- Start with a balanced mix of “brown” and “green” materials: To make the best compost, mix dry, carbon-rich materials, like leaves and twigs (browns), with moist, nitrogen-rich materials, like vegetable scraps and grass clippings (greens).
- Keep your compost pile moist: Composting requires moisture to help break down the organic matter. Make sure your compost pile is damp, but not soaking wet.
- Aerate your compost: Regularly turning the compost pile with a pitchfork or compost aerator helps to ensure that air circulates throughout, which is necessary for the microorganisms to thrive.
- Shred or chop large materials: Cut large materials into smaller pieces so they will break down faster. This also helps to aerate the pile.
- Add compost activators: Adding compost activators, like compost starter or microbial inoculants, can help speed up the composting process.
- Keep the right temperature: A hot compost pile should be between 130°F and 160°F. This temperature range helps to kill weed seeds and pathogens.
- Avoid adding meat, dairy, or oils: These materials can attract pests and create unpleasant odors.
- Store composting materials in a bin or pile: Keeping composting materials contained helps to keep pests and odors under control.
- Monitor the compost: Check the compost regularly to make sure it’s moist and has a good mix of brown and green materials.
- Use compost in your garden: Once the compost is fully broken down and looks like rich, dark soil, it’s ready to use in your garden. Use it as a soil amendment or as a top dressing for your plants.
By following these tips, you can make compost that will add valuable nutrients and organic matter to your garden soil, leading to healthier plants and a more productive garden.
Top Selling Composters
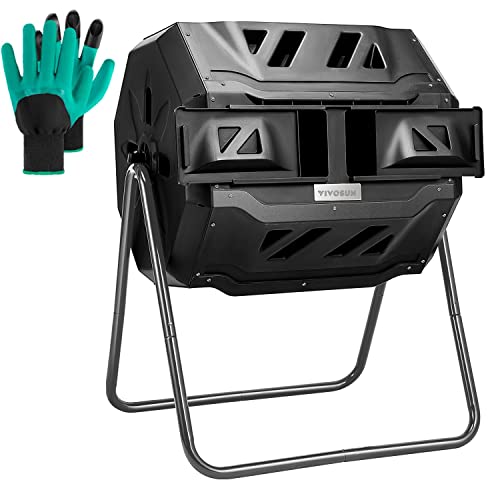
- Twin chambers: Two separate chambers allow one side to finish composting while leaving the other side available to add fresh wastes; Constant alternation of the two sides will create an uninterrupted...
- 360⁰ Tumbling Design: The rotating design prevents you from digging or mixing the pile by hand; And the deep fins on eight panels make it easier to turn the compost bin
- Excellent Aeration: Air vents can make the air fully circulate and will not cause an explosion due to excessive internal pressure; Deep fins can better break the clumps, which is conducive to the full...
- Sturdy & Durable Construction: Constructed of premium metal frame and high-quality pp plastic body, this tumbling composter is corrosion-resistant, weathering-resistant, sturdy, and durable for...
- Garden Gloves Included: The gloves that not only protect your hands from injury, but are also waterproof, making them easy to clean; With 4 durable ABS plastic claws for easy digging, planting and...
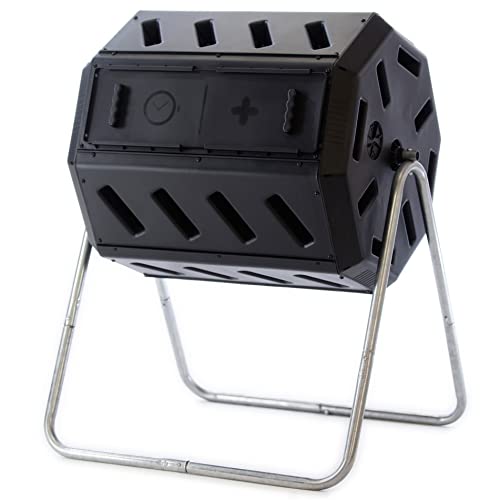
- Made in Canada from 100% post-consumer recycled plastic - The original 8-sided dual chamber tumbling composter.
- TUMBLING COMPOSTER – Avoid digging and mixing your compost pile by hand. The tumbling design makes mixing easy and efficient. Just close the door and turn it 5-6 times every 2-3 days. In hot sunny...
- EASY TO USE – Fantastic for beginners! The large openings and removable door make it easy to add scraps/clippings and remove finished compost. Deep fins on the body provide great ergonomic...
- TWO COMPOSTER CHAMBERS ARE BETTER THAN ONE – Two separate sides allow the first side to finish while leaving the second side available to add fresh scraps/clippings. Continuously swapping sides...
- EXCELLENT AERATION – All our composter models feature aeration holes as well as deep fins to break up clumps inside the chamber and mix lots of oxygen into the compost. Tumbling composters allow far...
- 【Sturdy Construction】--This large tumbling composter makes recycling kitchen scraps a breeze. This premium BPA free organic compost bin is made from PP material and powder-coated steel...
- 【Practical Dual Chamber】--The outdoor compost tumbler bin has 2 separate chambers that allow you can use the compost more frequently and efficiently while a single barrel composter, you have to...
- 【Convenience Aeration System】--The strong compost barrel features aeration holes as well as deep fins to break up clumps inside the chamber and mix lots of oxygen into the compost, please make...
- 【Rotatable & Easy to Assemble】--This rotating waste bin is relatively easy to put together - half and hour or less, manual with installation steps in every package, a pair of gloves and...
- 【Speedy Process & Space-saving】--Black color compost container can help absorb sunlight, allow for warm temperatures and faster composting. Compact enough for the outdoor space, looks nice in the...
Tips for watering and fertilizing your spring garden
Once your plants are in the ground, it’s important to make sure they’re getting the right amount of water and fertilizer. Check the soil to make sure it’s moist, but not soggy. You may need to water your plants more often during dry periods. When it comes to fertilizing, use a slow-release fertilizer to help your plants get the nutrients they need. You can also add some compost or organic matter to the soil to give your plants a nutrient boost.
Pest and weed control for your spring garden
Pests and weeds can be a major problem in the garden, so it’s important to take steps to prevent them. Start by removing any weeds or pests you find in your garden. You can also add mulch around your plants to help prevent weeds from germinating. If you’re having issues with pests, use natural predators like ladybugs to help control the population. You can also use organic pesticides to help keep pests at bay.
Here are some tips for pest and weed control in your spring garden:
- Start with healthy soil: Healthy soil is the foundation for a healthy garden. By adding compost, organic matter, and other soil amendments, you can help create an environment that is less favorable for pests and weeds.
- Use crop rotation: Crop rotation is a simple way to help reduce pest and disease problems. By rotating crops each year, you can help to break the life cycles of pests and reduce the buildup of diseases in the soil.
- Practice proper spacing: Proper spacing helps to improve air circulation and reduce the spread of diseases. It also makes it easier to spot and control pests and weeds.
- Use physical barriers: Physical barriers, like row covers or mulch, can help to reduce pest and weed problems. Row covers can protect plants from pests and prevent weed growth, while mulch can help to suppress weed growth and retain moisture in the soil.
- Attract beneficial insects: Beneficial insects, like ladybugs and lacewings, can help control pests in your garden. Consider planting flowers that attract these insects, like dill, fennel, and cilantro.
- Use companion planting: Companion planting is the practice of planting certain crops together that have a positive impact on each other. Some plants can repel pests or improve soil health, which can help reduce pest and weed problems.
- Monitor for pests and weeds: Regularly monitoring your garden can help you spot pest and weed problems early, which makes them easier to control.
- Use natural controls: If you have a minor pest or weed problem, consider using natural controls, like hand-pulling weeds or using soap and water to control pests.
- Use pesticides wisely: If necessary, use pesticides carefully and only as directed. Always follow label instructions and choose the least toxic option for your situation.
By following these tips, you can help reduce pest and weed problems in your spring garden, leading to healthier plants and a more productive garden.
Tips for harvesting your spring garden
Harvesting your spring garden is an exciting time. Start by checking your plants for signs of ripeness. Different plants have different harvesting times, so make sure to do your research. Once you’ve harvested your plants, make sure to store them properly and use them as soon as possible. You can also preserve some of your harvest by canning or freezing them for later use.
Conclusion
Spring is an exciting time for gardeners and there’s nothing quite like the feeling of harvesting your own produce. With these gardening tips, you’ll be well on your way to a successful and blooming spring garden. So, get ready to dig in and get planting!
No matter what your gardening experience is, following these tips will help you get the most out of your spring garden. From prepping your garden to harvesting your produce, it’s sure to be a blooming success!


